Potions in Mageia. 05 – How Mageia ranks amongst the best ‘user-friendly’ distros, even though many people aren’t aware of it.

This week, we’ve been concocting a potion using a few ingredients provided by our brilliant team of developers and packagers. The way applications are managed and packaged in Mageia, compared to other competitors, makes system management and software usage very straightforward for our users. The implementation of graphical tools such as the Mageia Control Centre forms an important part of the system, but what is not widely known is how certain applications are packaged compared to other systems, how the inclusion of plugins and software extras for applications is handled, and how dependencies are managed throughout the packaging process. Let’s get started!

Conceptual Principles

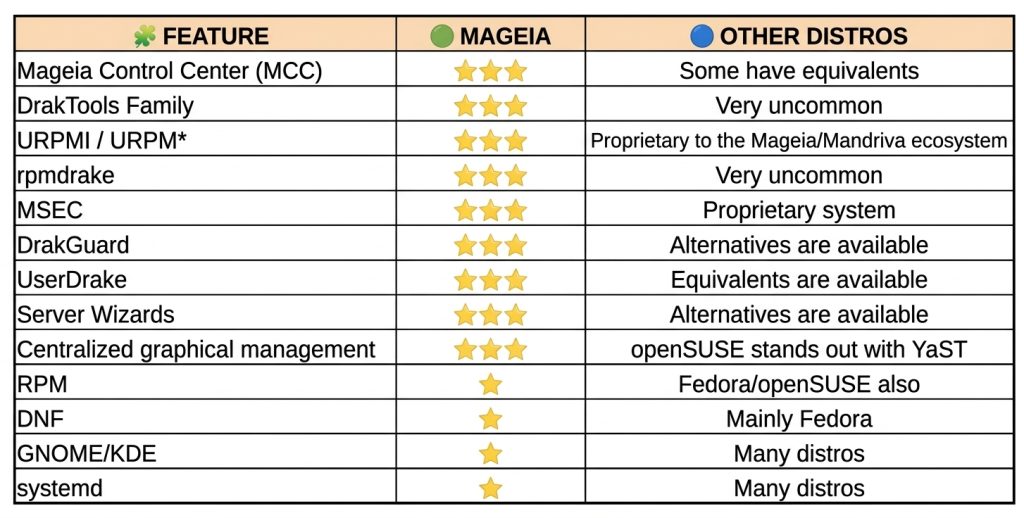
Mageia has inherited and refined the Mandriva/Mandrake packaging philosophy; our aim is to deliver ‘ready-to-use’ applications, without skimping on optional features or add-ons. Other distributions tend to package applications in their lightest version, leaving out plugins or add-ons, which forces the user to search for extra packages. In Mageia, we often include plugins, integrations and multimedia support directly within the application or under a single metapackage.

Mageia is characterised by an integrated packaging philosophy: rather than splitting a programme into multiple sub-packages or applying strict licence restrictions in the main repository, Mageia’s maintainers compile the software with as many extensions, filters and hardware support features enabled by default as possible, provided these add extra functionality to the application and are approved by the packaging team.
Our installer

In Mageia 10, we currently have URPMI (User RPM Installer), which is our default package manager and the backbone of both the graphical and terminal-based application installation processes, although native support for DNF (now DNF5) is also included.

URPMI has a number of advantages over its competitors, such as:

  • It uses very lightweight summary files containing only the data essential for resolving dependencies, allowing repositories to be queried or refreshed almost instantly, even on slow connections.
  • It does not need to store the full description and information for each package locally unless required, saving disk space in the indexes.
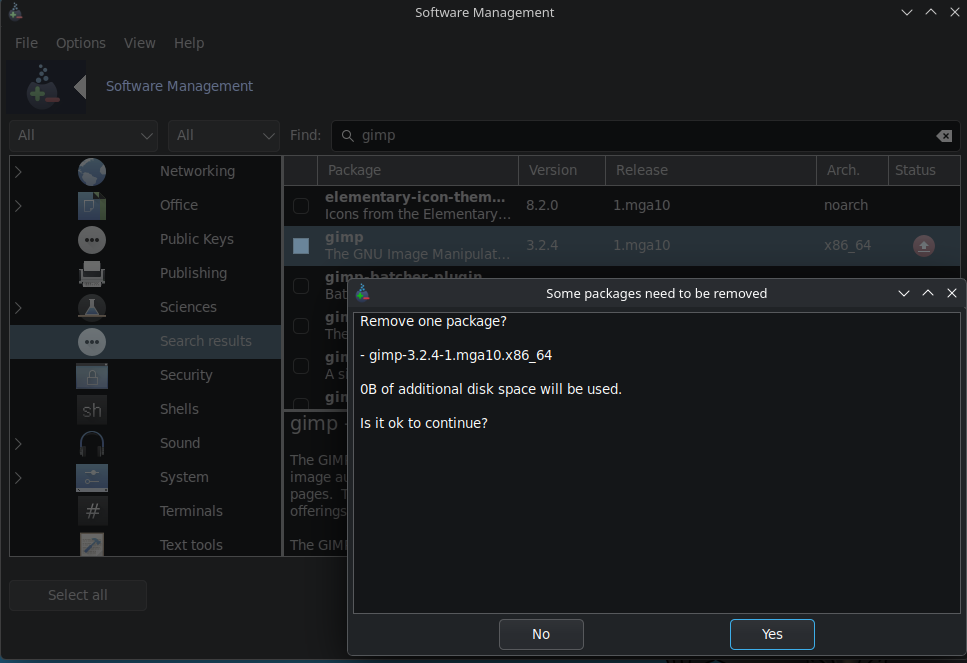
  • One of its greatest advantages is not just the command line, but the fact that the graphical package manager ‘rpmdrake’ shares the same engine. In other managers, the graphical tools act as independent wrappers that sometimes conflict or do not reflect the same statuses of orphaned packages.
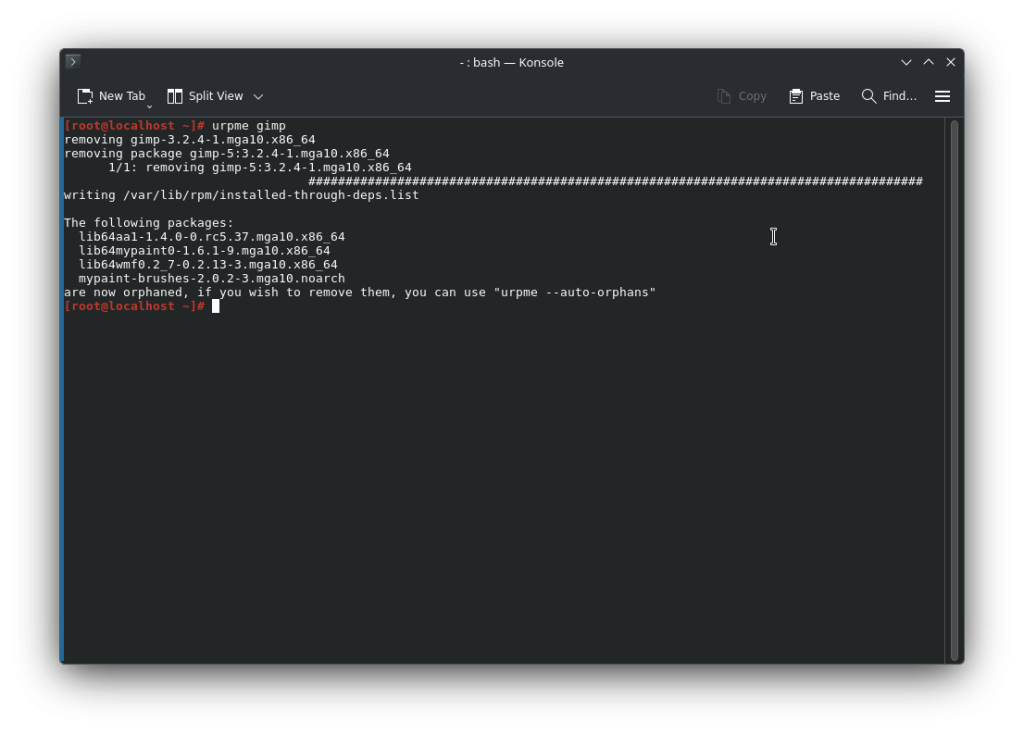
  • Urpmi has spent decades refining its algorithm for detecting orphaned packages left behind after uninstalling an application, adapting it to Mageia’s RPM package structure; this prevents critical system libraries from being uninstalled by mistake during the clean-up process.

DNF has also been enabled in Mageia due to a number of modern features:

  • Transaction history.
  • Modules and AppStream. Better integration with modern software repositories.
  • Active upstream support. It is maintained directly by the rpm.org project.

Some urpmi commands in the terminal:

  • urpme: to remove packages.
  • urpmq: to list packages.
  • urpmf: to search for packages containing specific files or capabilities.
  • urpmi: for installation and updates.


A brief diagram
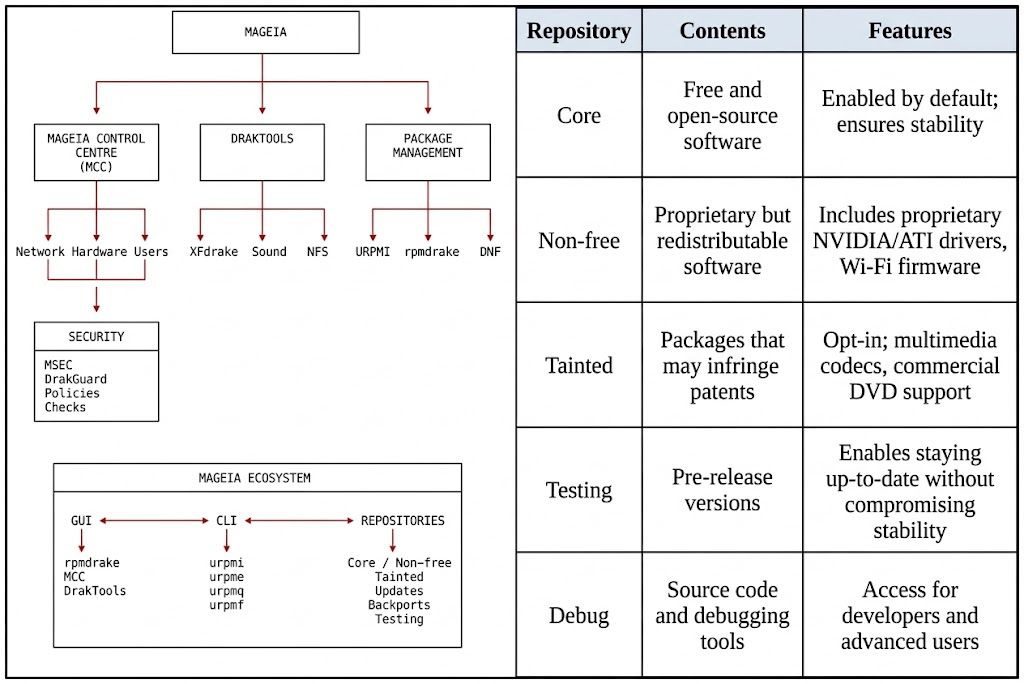
At Mageia, through our repository sections, we package versions of programmes that are compiled from day one with support enabled for, for example, all networking modules, streaming protocols and hardware-accelerated video, as well as numerous proprietary or obscure image formats that other distributions move to secondary repositories or remove altogether. End-user convenience is prioritised over strict ‘purity’ in packaging; provided that an add-on makes the packaged application more useful, this is largely due to the official ‘Tainted’ repositories dedicated to software subject to patents or legal restrictions in certain countries, which allow applications to be packaged in their full version without restricting functionality.

Mageia maintains the build infrastructure, dependencies, policies and controls to ensure that the packages form a coherent system.

A clear example of this is the “gimp-plugin-astronomy” package, which remains available for installation until the end of support for Mageia 9. Although it is no longer maintained by its creators, Mageia has continued to provide it for our users until the release of GIMP 3.0, with which it is no longer compatible due to the switch to Python 3.

Some other examples:

  • LibreOffice. In other distributions, it is packaged as separate components, and features such as icon themes, database integration or desktop environments are omitted.
  • Inkscape. In Mageia, it includes a dependency map that enables, by default, all extensions for mathematical rendering, bitmap processing and the import/export of CAD files, without the need to search for other Python libraries.
  • Audacity, VLC, Kodi. Through the various repositories, they are packaged with support enabled for features that do not appear in other distributions.
  • Pidgin. We’ve already discussed this application elsewhere. The Mageia package is very comprehensive, featuring many plugins and messaging protocols not found in other distributions.


A vision for packaging in Mageia
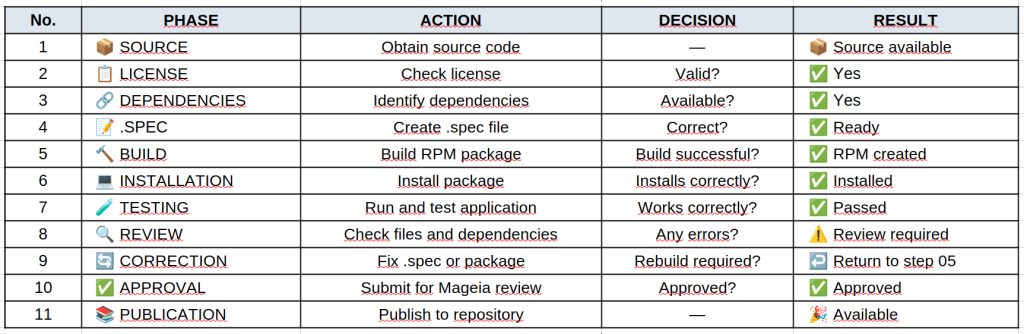
Behind the packaging process, there are defined policies and review procedures through which we aim to ensure the software fits into the system, rather than simply distributing the packages as published by the developers.

Some key features of our packaging:

  • Python. Clear conventions, pyproject, noarch, documentation and dependencies managed by RPM:
  • Java. We avoid duplicate JAR dependencies and maintain separation of components.
  • Firefox. Main package and separate translations. The required language is installed based on the system language.
  • LibreOffice. Installation of the entire suite and the required language based on the system language, in a single metapackage, or separate installation of individual applications.
  • Libraries. Separation of runtime, development and dependencies.
  • KDE/Qt applications. Specific policies for names, libraries and components.
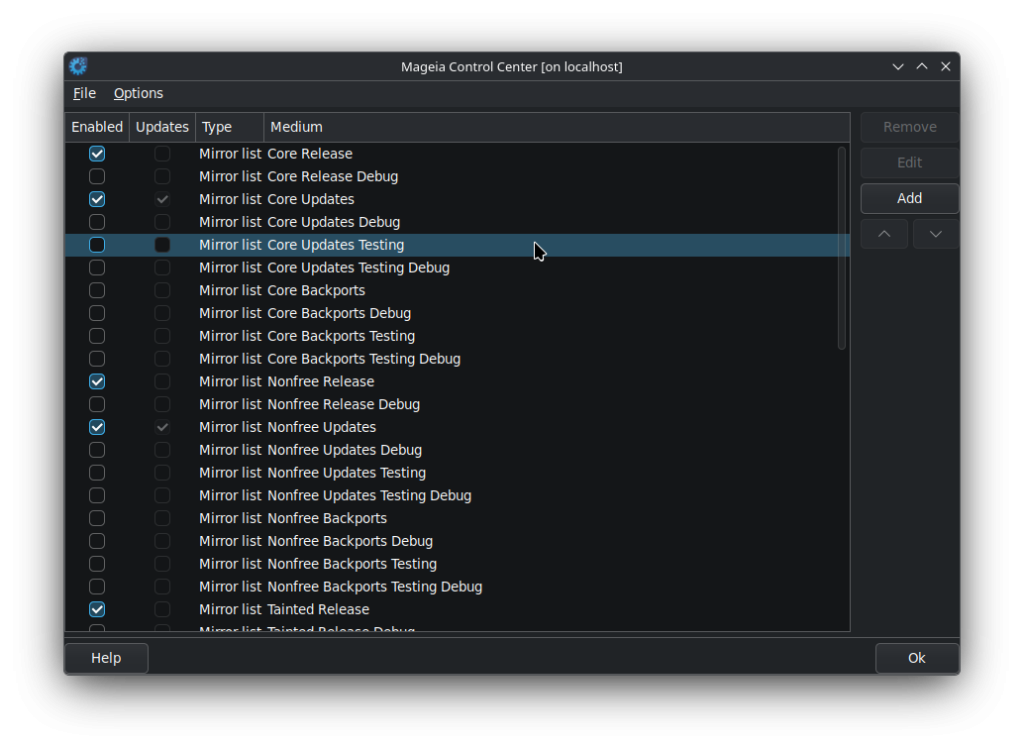
  • Licences. We maintain separation of licences via the ‘Core/Nonfree/Tainted’ repositories.
  • Updates validated by the QA team before reaching the stable release.

What does all this mean for the user?

Most of these decisions do not appear in a screenshot. They do not, on their own, make Plasma’s animations better or cause Firefox to open any faster.

Their value becomes apparent in more everyday situations:

  • Installing an application and automatically obtaining the correct dependencies.
  • Uninstalling it without leaving behind stray files.
  • Updating a library without ending up with multiple incompatible copies.
  • Installing only the languages we need.
  • Installing documentation only when we’re interested in it.
  • Having separate development packages.
  • Maintaining a consistent software base.
  • Receiving updates that have gone through a validation process.

In other words, our users don’t have to constantly think about packaging. If the job is done properly, it simply works.

Conclusions

The main strength of our packaging lies in the way all our teams work together to ensure that each programme fits seamlessly into the whole.

Packaging policies, the separation of components, the handling of dependencies, the careful management of third-party libraries, licence management and the quality control process all form an integrated and coherent system.

The work carried out by our packaging, development and quality assurance teams, whilst not visible to our users or the general public, is one of the most important factors in making our distribution a truly stable and reliable Linux distribution. A great deal of engineering work goes into ensuring that everything fits together to achieve the final result.
Posted in Uncategorized | Leave a comment

End of Support for Mageia 9

At Mageia, we have reached a significant milestone with the release of Mageia 10 on 30 June 2026. It has been a major step towards modernising our system in many respects, and our cauldron is already beginning to simmer as we prepare our next release, Mageia 11!

Mageia 9 has been rock-solid, with 24,008 updates to date, providing security fixes for our users. This is down to the hard work of all our teams, who ensure that Mageia remains easy to use and secure.

The time has come to say goodbye to our ninth release and focus on the new challenges posed by the maintenance of Mageia 10, the development of Mageia 11, and adapting our software to the changing times so that it supports the latest additions in both hardware and third-party software packaged for our Mageia users.

We hope that all the work carried out by our contributors will result in a great open-source system that is user-friendly, modern and up-to-date for our entire community. You can find the full list of features for Mageia 10 in the release notes.

Support for previous versions extends to 3 months after the release of the latest version, so Mageia 9 will no longer be supported as of September 30. We therefore ask that, if you have not already done so, you consider upgrading to Mageia 10, as support for Mageia 9 will end with the latest validated updates.

Migration can be carried out using:

  • The update application for major versions of Mageia in the system tray (currently the blue update icon).
  • Using the command line as described in the notes.

It is also possible to migrate to Mageia 10 with a clean install using the classic installation images. Live images can be used to try out Mageia 10 or perform a clean install, but they are not compatible for migrating to or upgrading to the new version of Mageia.

Please note that when performing a clean install, any data not stored on a separate partition or backed up to an external device will be deleted. Please ensure you have made the necessary backups.

If you have any questions or need help with the migration, you can visit our forums, which cover most languages, or the Mageia wiki.

Posted in Uncategorized | 6 Comments

Potions in Mageia. 04 – How proper cooking makes the final recipe pleasing to our users

This time, as promised in this new phase of publications on our official sites, we’re giving a voice to one of our users from the Mageia community. Today, we’re sharing their opinion piece. We’re struck by the sincerity with which they speak about the benefits of Mageia, and also, because nothing is perfect, by some usage ideas we can improve within Mageia. Without further ado, here’s their analysis, which encourages us to continue improving our distribution!

Why and when I prefer Mageia Linux. By Ricardo Naranjo Faccini

1.- Personal reasons.

In the vast universe of Linux distributions, every user has their own preferences and reasons for choosing one over another. Today I want to talk about Mageia, a distribution that may not be the most well-known, but which offers a number of advantages that make it stand out. Here I’ll tell you why and when I prefer to use Mageia Linux, and why you might consider giving it a try.

1.a. Flexibility without Complications

One of the main reasons I choose Mageia is its incredible flexibility. This distribution allows me to set up a complete lab that seamlessly combines server tools with desktop applications. I can have an Apache server and PostgreSQL running simultaneously while using LibreOffice and GIMP. This duality is ideal for both development environments and personal use.

1.b. Package and Repository Management

Mageia stands out for its repository organization. You can opt for an extremely stable system by keeping the repositories in their default configuration, or you can enable the “testing” repositories to stay up-to-date with the latest updates. Additionally, you can activate the “debug” repositories to access source code and debugging tools. This adaptability is perfect for different needs and risk levels.

1.c. Safety during Installation and Uninstallation

One of the biggest fears of Linux users is breaking the system when installing or uninstalling software due to dependency issues. Mageia handles dependencies efficiently, allowing me to install and uninstall programs with the peace of mind that the system will continue to function correctly.

1.d. Powerful Graphics Tools

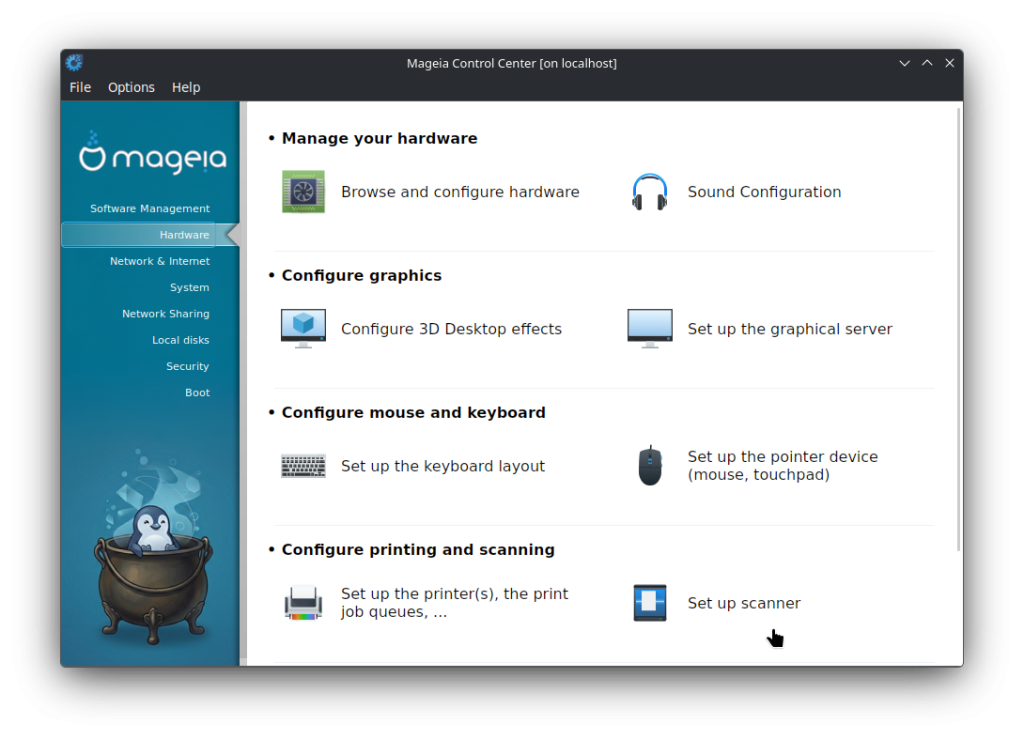
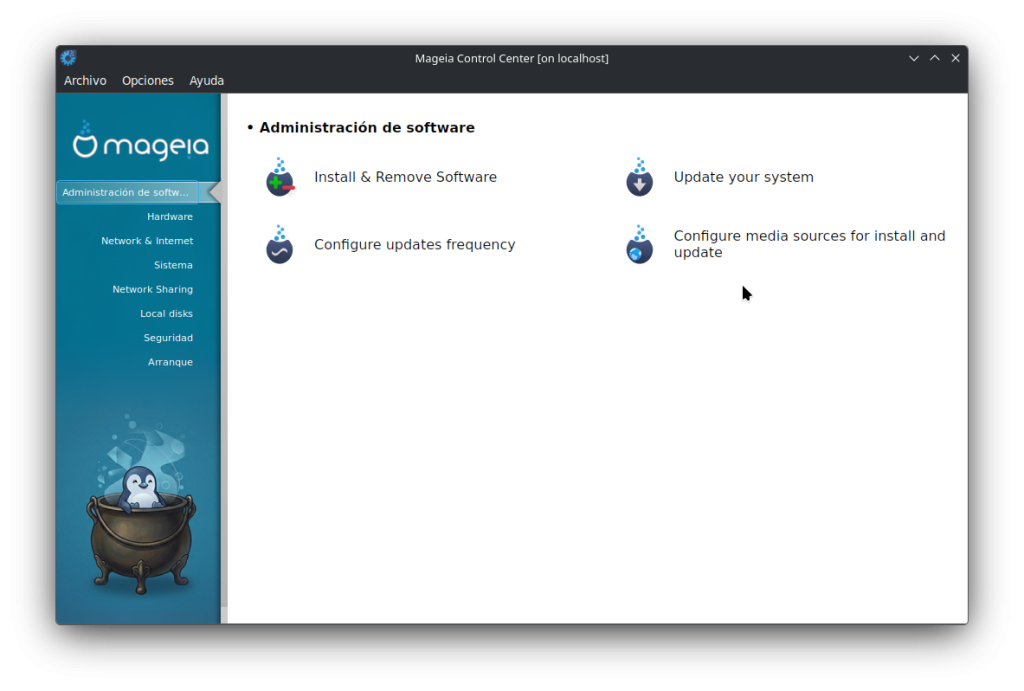
Mageia’s Control Center is one of its gems. This graphical tool allows you to manage the entire system intuitively, from hardware and network configuration to user administration and security. Not many distributions offer such comprehensive and accessible control.

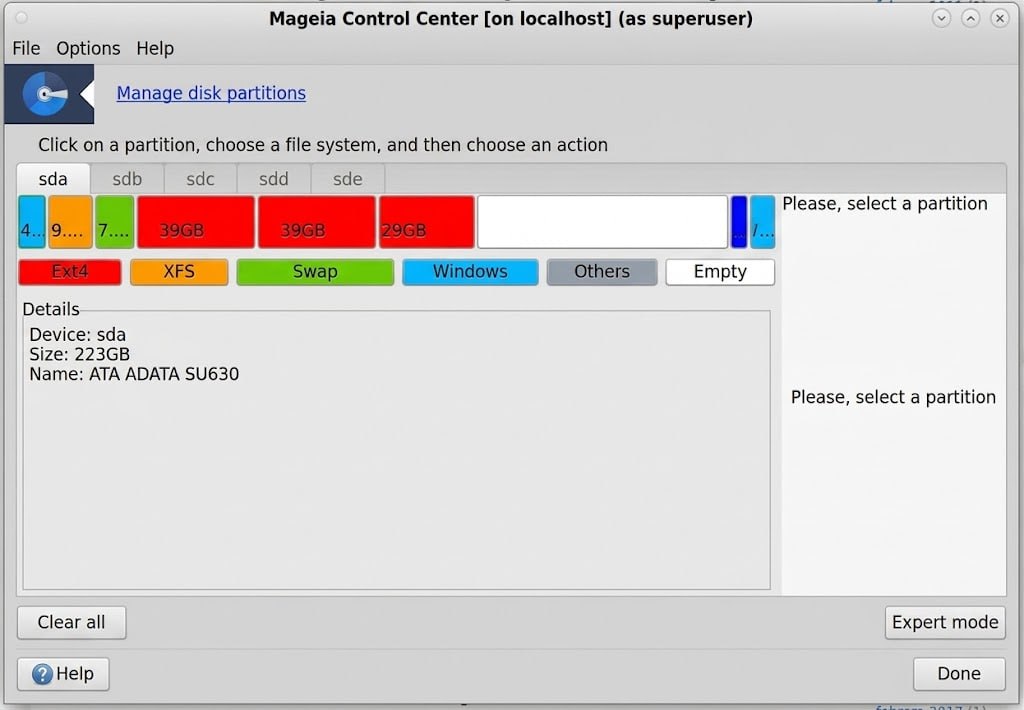
Furthermore, Mageia simplifies disk partitioning during installation. I can create and manage partitions graphically, and even retain my user settings if I need to reinstall the system. This functionality is especially useful for those who are not comfortable with command-line partitioning tools.

1.e. Similarity to Red Hat

Mageia shares many similarities with Red Hat, a distribution widely used in corporate environments. This makes Mageia an excellent option for those seeking an enterprise-grade distribution without the associated costs. Furthermore, familiarity with Mageia facilitates the transition to Red Hat in the workplace.

1.f. Community and Support

Although not the most popular distribution, Mageia boasts an active and supportive community. Users can find help, share experiences, and access additional repositories. This kind of community support is invaluable, especially for new users.

1.g. Ease of Use and Diversity

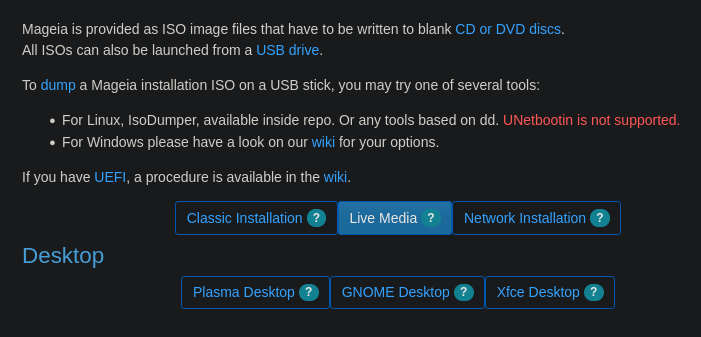
Mageia is user-friendly for both beginners and advanced users. It’s easy to install and offers a wide variety of desktop environments to choose from. The full DVD version lets you try different desktops with a single click, making it easy to find the environment that best suits your needs.

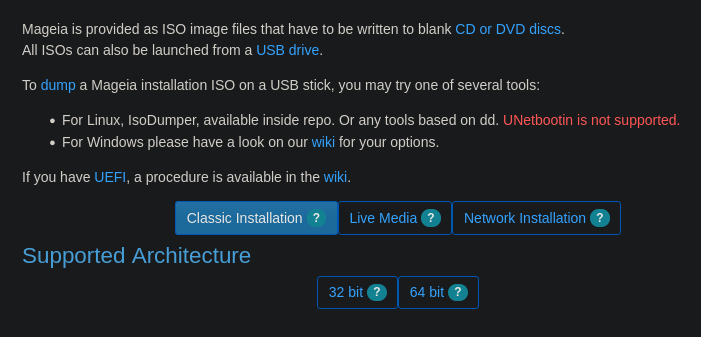
Another advantage that I greatly value about Mageia is the availability of its Live versions, which allow you to boot the entire system from a USB memory without modifying the hard drive. This is perfect for both testing the distribution and verifying hardware compatibility without compromising the main equipment, or for setting up a temporary, homogeneous laboratory in minutes during a teaching session.

Furthermore, in the context of a trip, the Live version becomes an invaluable protection tool. If I need to use a rented computer at an internet cafe, just restart the computer from my USB to work in a clean environment controlled by me.

This way, I can carry out my tasks with complete peace of mind, eliminating the suspicion of interacting with malware installed on the host system and ensuring that no trace of my information or credentials is left when the machine is shut down.

2. When do I use Mageia?

I prefer to use Mageia in several scenarios:

  • Laboratory or Development Environments: Its ability to combine server and desktop applications in a single system is ideal for testing and development.
  • Personal Use: The stability and ease of management make Mageia an excellent choice for my daily use.
  • Teaching: When I teach Linux, Mageia is a formidable educational tool thanks to its flexibility and wealth of graphical tools.
  • Transition to Corporate Environments: For those interested in a career in IT, Mageia offers a solid foundation similar to Red Hat, facilitating the transition to corporate environments.

3. When I Prefer Other Distributions

Although Mageia is my preferred choice in most cases, there are very specific situations where other Linux distributions can be more suitable:

  • AlmaLinux OS and Rocky Linux—the successors to CentOS—for managing standalone enterprise servers.
  • Red Hat or SUSE, for corporate environments requiring support contracts and strict certifications.
  • Ubuntu: while its desktop environment currently bears no resemblance to Microsoft’s system, it remains highly recommended for the transition from Windows to Linux. Much of this recommendation likely stems from a lack of awareness regarding solid, user-friendly alternatives like Mageia.
  • Slackware or Gentoo: for extreme customization and absolute system control, suited for advanced Linux users who prefer terminal-based management.
  • Kali Linux or Fire, for digital forensics and penetration testing, featuring specialized environments designed to run from a live version without requiring local installation.

4. Conclusion

Mageia may not be the most popular distribution, but its advantages are undeniable. From its flexibility and efficient package management to its powerful graphical tools and active community, Mageia offers a robust and accessible experience. Whether you are looking for a development environment, a stable system for personal use, or an educational tool, Mageia is an option worth considering. Give it a try, and you will likely discover why it could become your preferred Linux distribution.

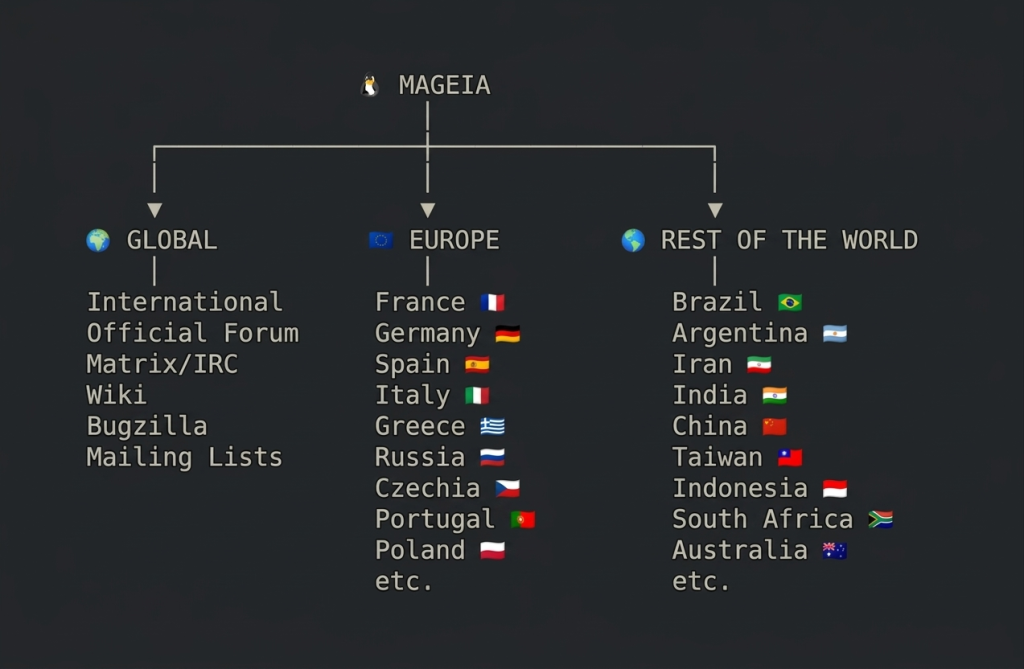
That concludes the analysis by our user Ricardo Naranjo Faccini; we will continue to work towards improving Mageia and giving our users a voice. Our distribution is a community project, legally established as a not-for-profit association run by an elected board of directors, unlike some of our better-known competitors. As advocates who recognize the benefits of free software, we invite you to share your ideas about Mageia with us on our open social media channels Mageia Matrix or Mageia IRC. You can also share your experiences using Mageia on other social networks by mentioning @Mageia or #Mageia, or by posting on our page Mageia Facebook.

Posted in Uncategorized | 4 Comments

Potions in Mageia. 03 – Elograf or how have voice dictation with Mageia

Have you ever needed voice dictation but couldn’t find a way to do it on Linux? Mageia offers Elograf with everything you need to get it working with just a few clicks. Let’s get started!

Tutorial – Installation

From our Mageia repositories

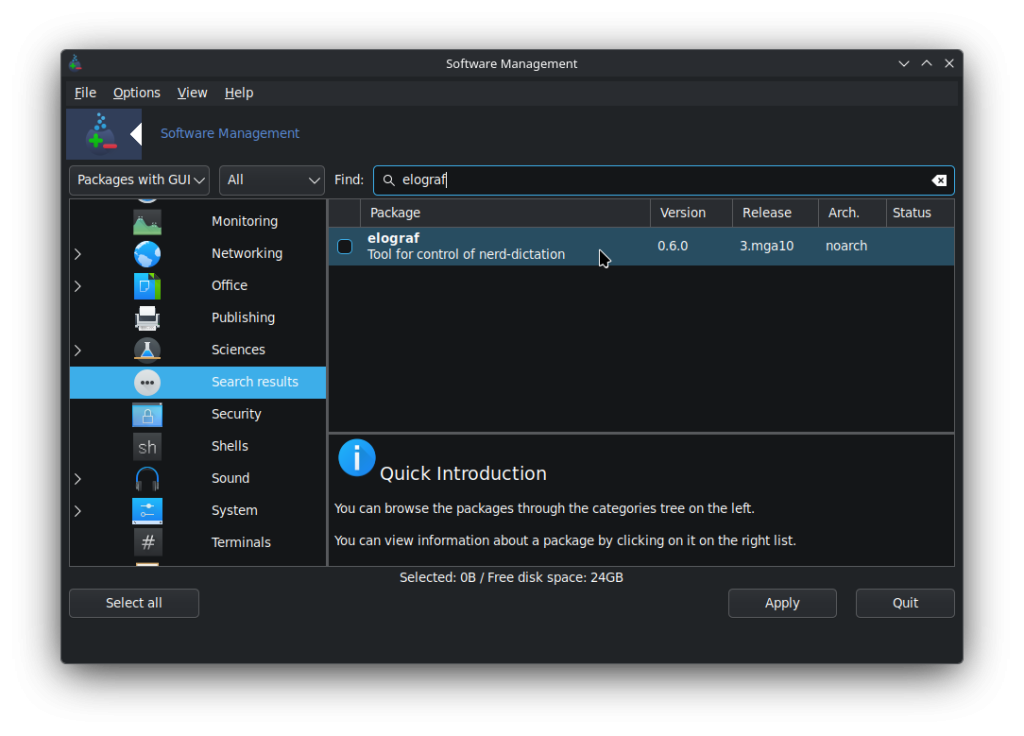
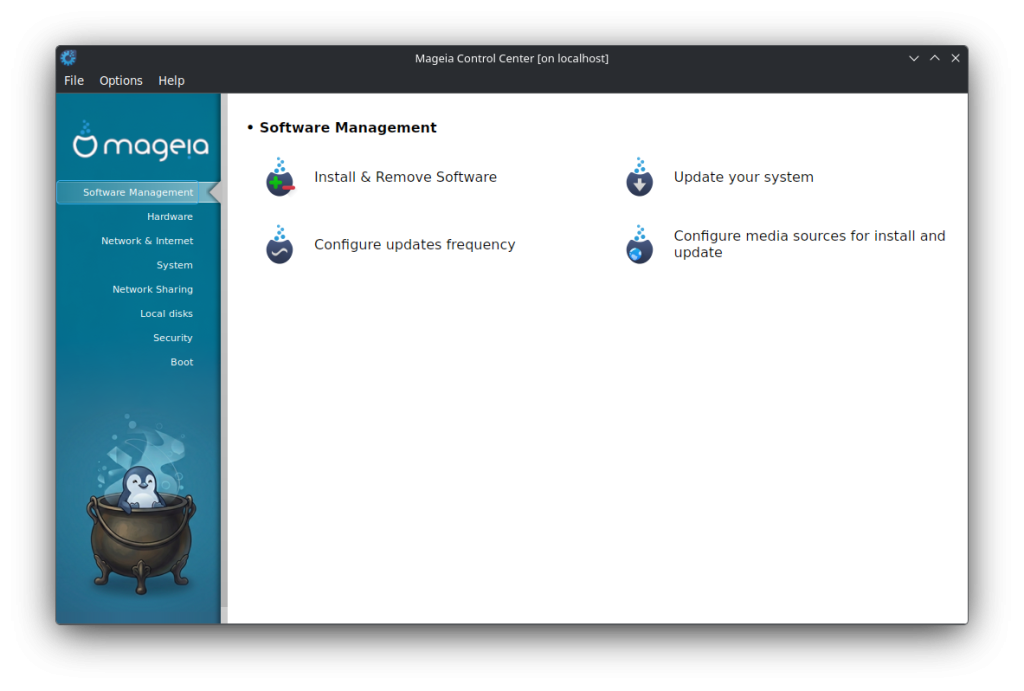
Since the release of Mageia 9, installing Elograf from our repositories is as simple as selecting the application from the package manager from “Install and remove applications” in the start menu or by entering the Mageia Control Center (MCC), and Mageia will install all the necessary packages to make Elograf fully functional, including kaldi, vosk-api, and nerd-dictation.


Voice model installation


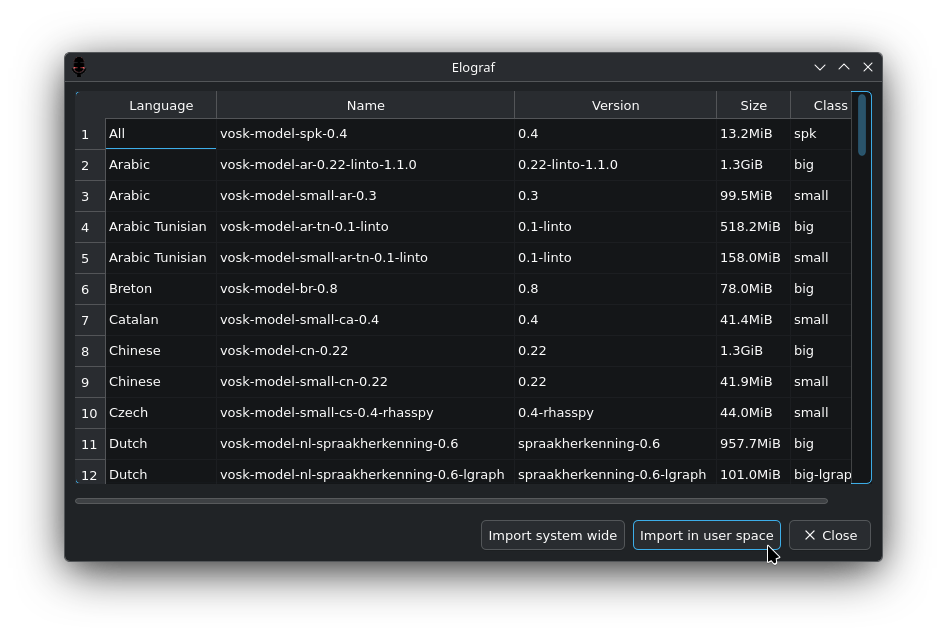
The program requires a voice model function. This model is specific to each language. The available models are listed on this page. The tests were performed using one of the extended models from the link mentioned above. These models can also be downloaded directly from Elograf and can be saved in either user or system space (root password required for this option).

Use

When you launch Elograf from the Mageia application menu, a microphone icon will appear in the system tray, which is disabled by default. Clicking the icon will activate Elograf and begin voice dictation.


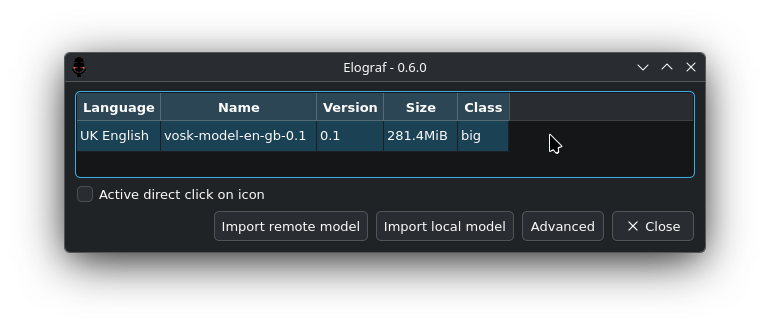
Right-clicking displays a menu that allows you to start dictation or access the settings. The settings menu shows options for adding models both locally, by downloading the file from the aforementioned link and specifying the saved location, and online. In the latter case, Elograf will open a list of available models for download and prompt you to choose the installation location, offering the option to install it in the user’s space or the system space from the same window.


By choosing “Activate direct click on the icon”, the start of dictation is controlled by a left click on the icon.

It is recommended to add Elograf to the list of applications set to run automatically at system startup. This will add its icon to the system tray, allowing quick access to commands. The method for configuring this option depends on your desktop environment.

After these settings, you can go to the application where you would normally write text, such as Libreoffice Writer, place the cursor where you want to start and begin dictating. At launch, you may have to wait a little while before the first vocalizations are recognized; this is the template’s loading time.

Some of the advantages you can find with this application:

  • Offline dictation. Voice recognition is performed using Vosk and locally downloaded models, so there’s no need to send the audio to a cloud service. This provides privacy and allows dictation even without an internet connection.
  • Works in almost any application. The recognized text is entered into the currently active application, so it can be used in text editors, browsers, email, forms, etc.
  • Saving on text when writing long texts. Speaking is usually faster and more comfortable than typing large amounts of text, especially for drafts, notes, emails, or documents.
  • Reduced keyboard usage. Especially useful when you want to decrease continuous keyboard use or alternate between typing and dictation.
  • Control from the system tray.
  • A selection of different downloadable language packs.
  • Simple setup, compatibility with X11 and Wayland (For Wayland, the keyboard emulator should be set to “DOTOOL” in the “Advanced settings”, with the keyboard specified.
  • Open source.

More information in our Wiki!: Voice recognition in Mageia.

Posted in Atelier, Collaboration, community, Mageia, Uncategorized, users | Tagged , , , | Leave a comment

Potions in Mageia. 02 – “Discover” Flatpak Gui App Installer

Do you have a need for a software title that does not appear on the Mageia repositories list (MCC–>Software Management–>Install & Remove Software)? Such as the Google Chrome, Zoom, Spotify etc.? 

The KDE/Plasma project offers a solution to this with their “Discover” flatpak GUI app installer. This app is available for installation on the MCC repositories.

Tutorial 

To install and set up the Discover app, do the following:

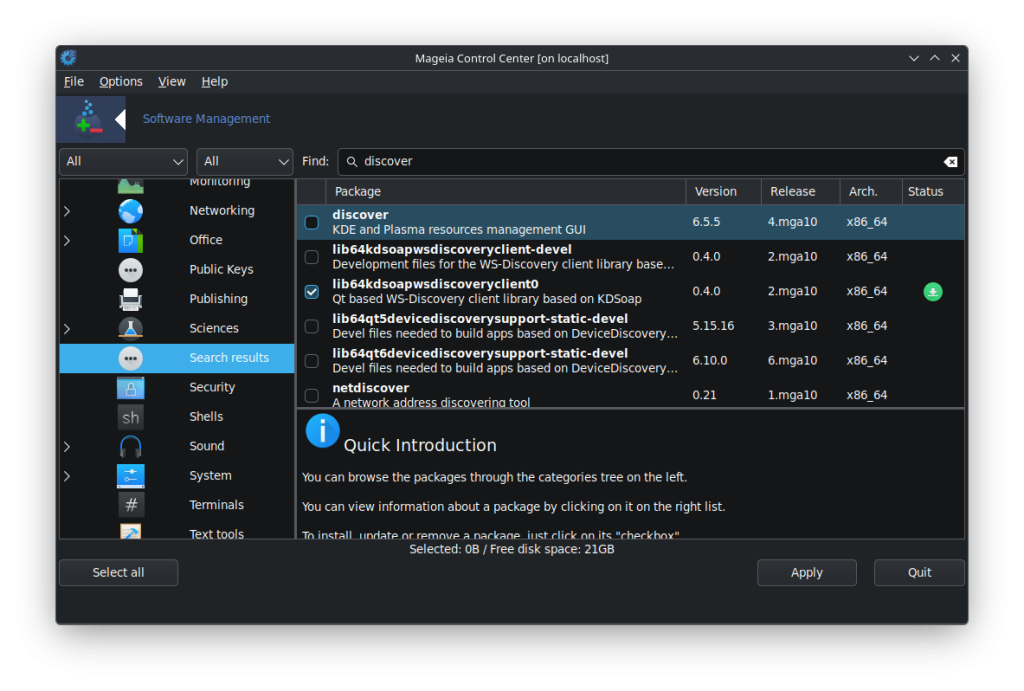
  • Go to the MCC (Mageia Control Centre) –> Software Management –> Install & Remove Software section.
  • In the search field put “discover”.
  • The MCC will return a list of apps that contain the word “discover”.
  • Choose “discover” (KDE and Plasma resources management GUI).
  • Click on the “Apply” button on the bottom of the MCC window.
  • Click on “OK” to complete the installation of “Discover”.
  • Once the installation is completed, close the MCC window as you no longer need it for the next steps.
  • Click on the bottom-left-hand taskbard Start button and go to “Tools –> System Tools –> Discover”.
  • Discover will start for the first time.

You will now need to complete the Discover configuration.

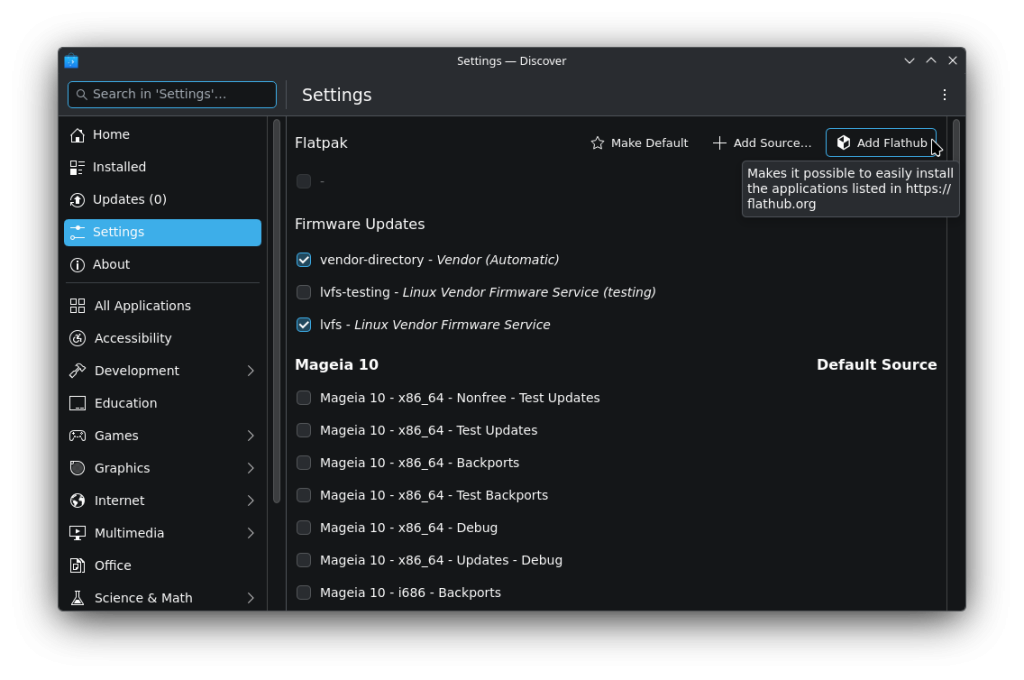
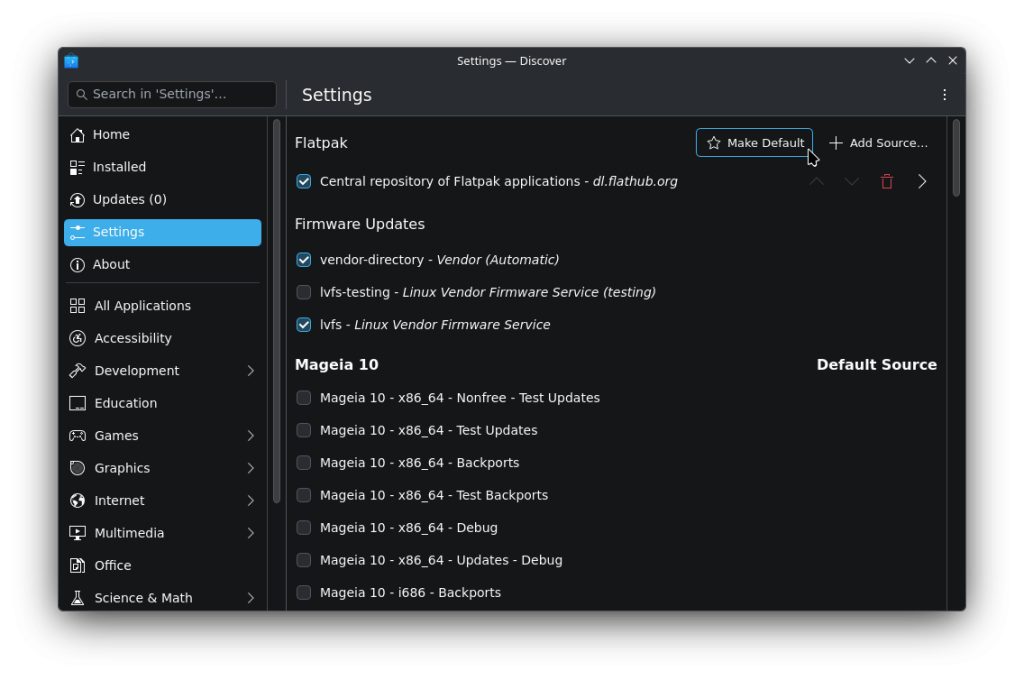
  • Click on the left-hand menu item “Settings”.
  • Choose the item where it says to “Install Flathub – dl.flathub.org”.
  • Then, *** COMPLETE THIS IMPORTANT STEP *** — Under the “Mageia 10” column, UNCHECK every other category on the remaining list items.
    • This should leave the only checked category of “Flathub – dl.flathum.org”; “vendor-directory – Vendor (Automatic); lvfs – Linux Vendor Firmware Service” on the whole list.
  • You will now need to define the frequency of Discover’s update routine.
    • On the upper-right-hand-side of the Discover window, click on the three dots.
    • Choose “Configure Updates”. This will take you to the “KDE System Settings App Update” page.
    • Choose the settings that best suit you.
  • You have now installed and completed the Discover “flatpak” configuration.

To install flatpak Discover apps:

  • In the Discover app, click on the left-hand menu item “Home”.
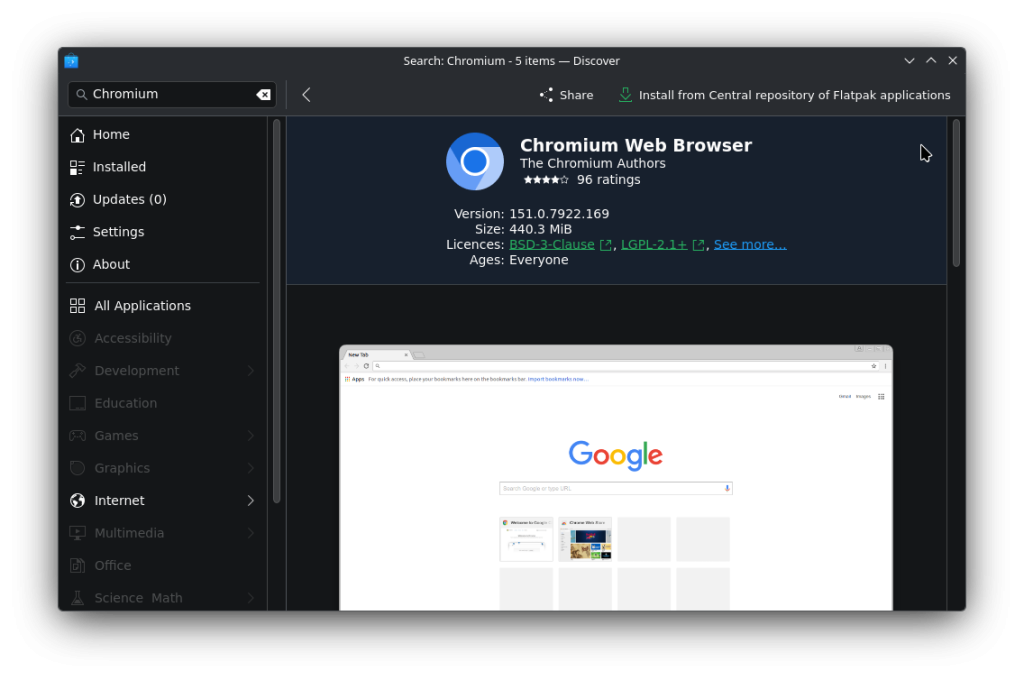
  • In the search field (at the top of that window), type in the software app that you would like to install.
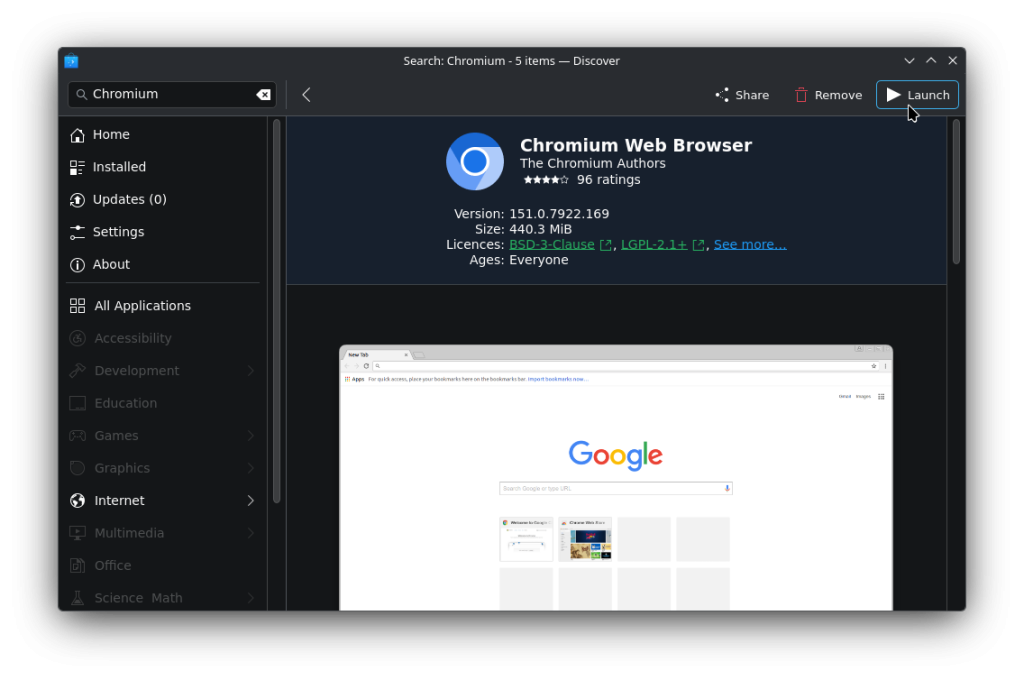
    • For the purposes of this tutorial, we will use the “Google Chrome” app.
  • Type “Chrome” in the search field and do a keyboard “Return”.
  • You will now see the Google Chrome app (that is not found/supported in the MCC repositories).
  • Click on “Install” on the “Google Chrome” selection.
  • Discover will then install the flatpak Chrome app
  • At some point, Discover may/will ask you for the root password to complete the installation process.
  • Once the Chrome app is installed you will now see that the “Install” button now shows “Remove”, which, you may use later if you wish to remove the app.
  • You will now find the “Chrome” browser somewhere in your Mageia Start-button menu (lower-left-hand bottom taskbar) — > Internet — > More.

The same process of installing other flatpak apps will follow the same procedure.

A note on the Discover repositories and upkeep/updates.

The KDE/Plasma project developers maintain the Discover app updates and, from experience, do an excellent job of keeping the official supported app versions current. Discover will, from time to time, notify you of needed updates with a notification button-icon on the bottom-right-hand side of your bottom taskbar. 

Make sure to complete Discover updates as soon as possible for the sake of keeping these apps as up to date as possible. A reminder that you should also complete as soon as possible any MCC update notifications when they come up on your bottom-right-hand taskbar as well.

This author suggests to continue to use the MCC as your main package and update app, and use the Discover app to install only those packages that are not found on the MCC app lists; the Mageia app maintainers do an excellent job of keeping the MCC repositories current and the URPMI management tools are well known as dependable and efficient.

Notes of importance/warnings.

If you would like to use Discover along with the MCC, make sure that you complete the Discover setup as mentioned above and leave the only checked categories of “Flathub – dl.flathum.org”; “vendor-directory – Vendor (Automatic); lvfs – Linux Vendor Firmware Service” on the whole list just as detailed above. OTHERWISE, both of the MCC and Discover will suggest updates to your Mageia system that may conflict with each other. This author suggests to continue to use the MCC as your main package and update app, and use the Discover app to install only those packages that are not found on the MCC app lists; the Mageia app maintainers do an excellent job of keeping the MCC repositories current and the URPMI management tools are well known as dependable and efficient.

  • NOTE that this tutorial is meant for a Mageia installation and, although the Discover app may be installed on other Linux flavours, this author does not accept any responsibility for any installation of Discover on any other distros.
  • NOTE that, as per usual, the installation of Discover should only be done on a Mageia system that has been well backed up, and, also fully updated through the MCC GUI.
  • NOTE that this author presents this tutorial purposely through the GUI version of the MCC and Discover with no mention of any use of any console.

You also have this tutorial available in our wiki for future reference here: “Configure Discover as a Flatpak package manager”

Posted in Atelier, community, Mageia, Uncategorized | Tagged , , , , | Comments Off on Potions in Mageia. 02 – “Discover” Flatpak Gui App Installer